This content was written by
LessEverything.com
to help others make informed decisions about building a backyard shed office.
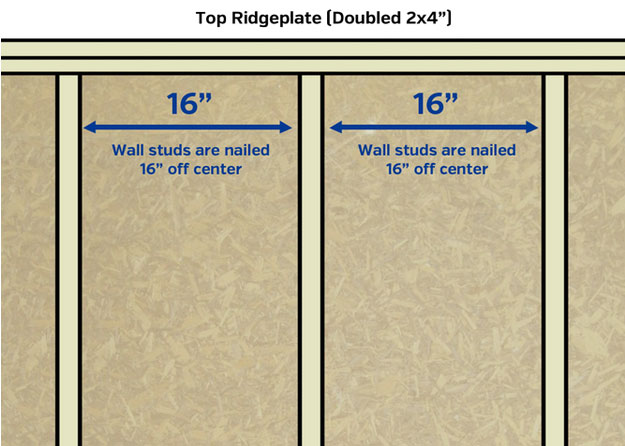
Walls are typically built with 2’x4’ wood, and they’re pre-cut to 8 feet as well. Most stores even call them “wall studs.” Each wall stud is spaced 16” off-center from the next wall stud.
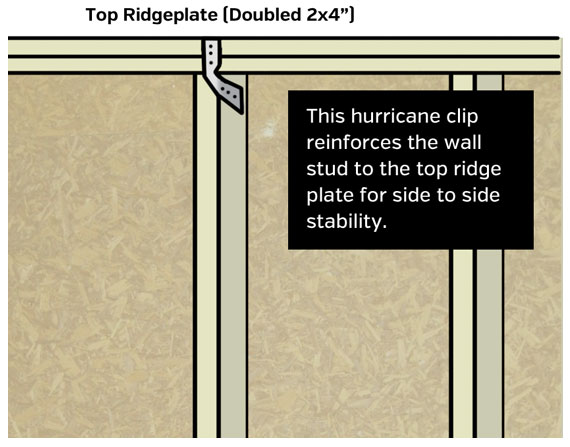
Because I’m in Florida, hurricanes are our main concern. Our new residential building code is really worried about side-to-side wind resistance, so I used of hurricane clips or “h-clips.” Hurricane clips strap the wall studs to the header and footer of each wall and later strap the rafters into the walls.
There are many types of reinforcement clips and straps. Here are a few.
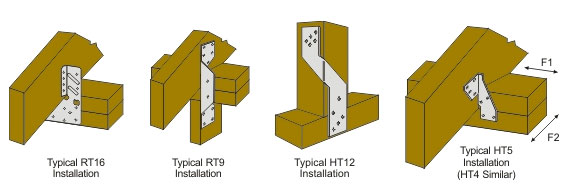
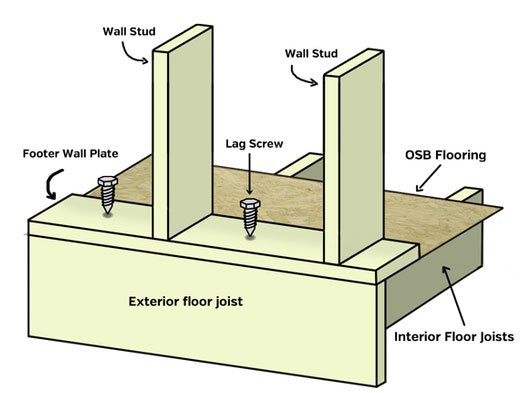
Using 4-inch lag screws, I secured the walls to the below-floor joists. This is overkill if you’re not in a hurricane threatened state. I also used long metal brackets to strap corners together, only because I’m obsessive and it was fun nailing in straps. The reality is these brackets cost $.50-$2 apiece so you can strap and clip your whole building for a couple hundred bucks.
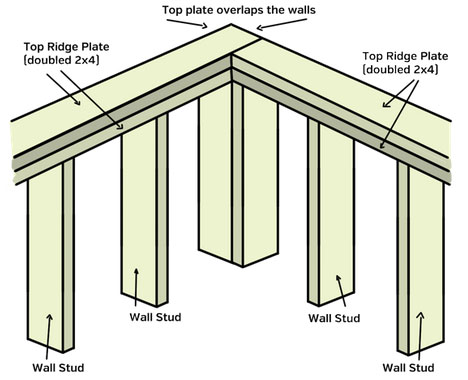
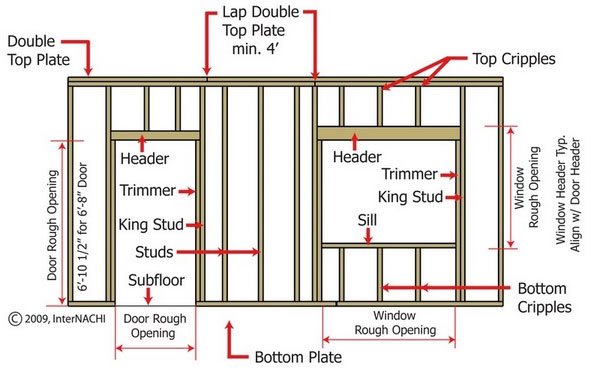
The walls have a continual top plate nailed to them as well. You want the top plate to overlap from wall to wall; it’s called a “ridge plate.” Also rent or buy a nail gun for any project larger than 5’x5’ because it will save you so much time. You’ll want to use 3” shanked nails for the framing, often they’re called “10 penny” nails.
Let me just stop and say, learn to be exact with making things straight and plumb. The walls are the skeleton everything else goes into. If you’re not exact with your nailing, it throws off all the other steps (sheathing, siding, windows, etc.).
Think of a window or door as a giant hole in your wall. With a giant hole you’re removing wall studs and weakening the wall’s integrity. Typically over a window will be “header,” which is a solid piece of 10”-14” wood. Along the sides of each opening will be 8”-14” of wood to brace the opening. Under a window are additional cripples and crutches to support the window and downforce.
I bought two windows from a local surplus and salvage business for $15 each. Look on Craigs List for windows. You’ll need to make sure your windows have nail-tabs to secure them. Window installation isn’t very hard but
here’s a video of it.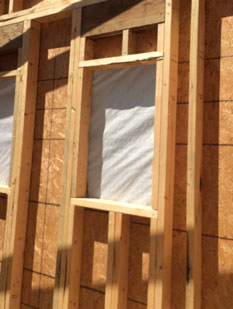
So you now have walls, square and plumb, but you want to close in and weatherproof the walls. Wall sheathing is next, and most people use OSB again for this. Be sure you put the correct side out. OSB usually has lines drawn on them at 16” spaces so you can know where to nail the sheets. You’ll be using 8 penny or 2.5-inch nails on these. Each state has a “nailing schedule” which tells you how often you should be dropping in a nail. After sheathing is plastic house wrap, which is stapled in using a stapler that looks like a hammer. You’ll layer the plastic wrap, bottom layer first,
here’s a video of it.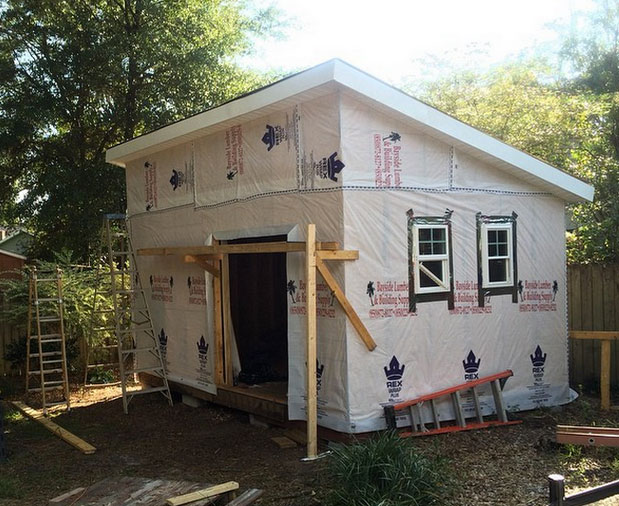
Okay, walls are up, wall sheathing is up, and house is wrapped.