I recently spent some time dealing with nested forms in Phoenix. Nested forms are great when you want to create multiple database records in a single transaction and associate them with each other. I am new to Phoenix and really struggled to find any resources that helped me with my specific problem. I decided to document what I learned in the process in hopes of helping others that are new to Elixir and Phoenix.
For this example we are going to build a basic Todo app. Let’s go ahead and create a new application called todo. To do this run the following commands in your terminal.
mix phoenix.new todo
Then switch into the directory:
cd todo
We can now start to scaffold out the List resource to work with.
Run this command in your terminal:
mix phoenix.gen.html List lists name:string
This is going to generate a model and the corresponding view, templates, and controller.
This generator created everything we need except for the proper routes. To fix this we need to open web/router.ex and add resources “lists", ListController .
Your web/router.ex file should look like this. (… indicates truncated code)
defmodule Todo.Router do
  use Todo.Web, :router
  ...
  scope "/", Todo do
    pipe_through :browser # Use the default browser stack
    get "/", PageController, :index
    resources "/lists", ListController
  end
  ...
end
Now we need to scaffold out our Items resource.
In your terminal run:
mix phoenix.gen.html Item items body:string list_id:references:lists
We also need to add the routes for Items. Open web/router.ex and add resources “items”, ItemController .
This is almost identical to what we did with Lists but now we have added list_id:references:lists to the end. This will ensure there is a relation between our models, making it so a List has many Items and a Item belongs to a List. This automatically will add belongs_to :list, Todo.List in your Item model and will create a list_id foreign key in your Item schema.
There is one final step we have to take to finish this relation and that is to add has_many :items, Todo.Item, on_delete: :delete_all to the List model. Open up web/models/List.ex and change it to look like below.
defmodule Todo.List do
  use Todo.Web, :model

  schema "lists" do
    field :name, :string
    has_many :items, Todo.Item, on_delete: :delete_all

    timestamps()
  end
  ...
end
Now that we have our models setup lets get our database up and running. First we will create the database with
bash
mix ecto.create
then we will run the migrations with
mix ecto.migrate
If you are new to Phoenix and are confused by the code that was generated I highly recommend getting Programming Phoenix by Chris McCord. He does a great job walking you through how to build a simple Phoenix application without using generators.
Now is a good time to fire up the server and check out what the generators have built for us so far. Run the following in your terminal:
mix phoenix.server
and navigate to http://localhost:4000/lists.
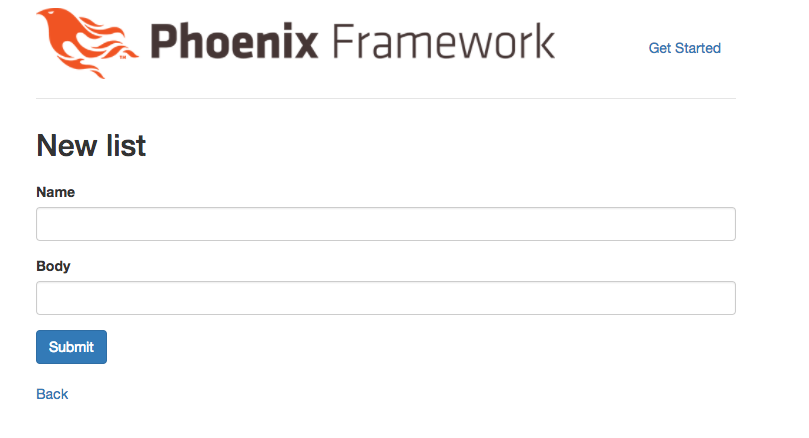
(Wow, doesn’t that look pretty! Phoenix comes preloaded with Bootstrap and so all of the generated code looks nice straight out of the box.)
You will see that we can click New List and we are taken to a form that allows us to create a new List. The is great, but we want to be able to create a new List and an Item at the same time from within the same form.
In order to do this we have to make a few changes to our form and controller.
First go to web/templates/list/_form.html.eex. We are going to use inputs_for to build out our nested form. inputs_for allows us to attach nested data to the form. (If you are coming from a Rails background this should look similar to fields_for and accepts_nested_attributes_for.)
Add the following to the your form.
  <%= inputs_for f, :items, fn p -> %>
    <div class="form-group">
      <%= label p, :body, class: "control-label" %>
      <%= text_input p, :body, class: "form-control" %>
      <%= error_tag p, :body %>
    </div>
  <% end %>
Now your form should look like this:
...
  <div class="form-group">
    <%= label f, :name, class: "control-label" %>
    <%= text_input f, :name, class: "form-control" %>
    <%= error_tag f, :name %>
  </div>

  <%= inputs_for f, :items, fn p -> %>
    <div class="form-group">
      <%= label p, :body, class: "control-label" %>
      <%= text_input p, :body, class: "form-control" %>
      <%= error_tag p, :body %>
    </div>
  <% end %>

  <div class="form-group">
    <%= submit "Submit", class: "btn btn-primary" %>
  </div>
<% end %>
Let’s head back to http://localhost:4000/lists and try to create a new List. We can see that even though we updated our form we still do not get an option to create a Item.
You may be thinking, “But why Mike? I just did all this work updating my form, shouldn’t it show up”. I had similar thoughts when I was trying to get this to work. If you take a closer look at the form you can see that it accepts a changeset as an argument. So lets take a look at that changeset we are passing in and see what adjustments we need to make.
If we take a look at our new action in our ListController we can see where the changeset is coming from. We need to update this changeset so it includes an empty Item by default.
Your new action should now look like this:
  def new(conn, _params) do
    changeset = List.changeset(%List{items: [
        %Todo.Item{}
      ]})
    render(conn, "new.html", changeset: changeset)
  end
Now if we head back over to our form we should finally see what we are looking for,
Congrats! We are getting closer. Go ahead and try to create a new List with a Item just to see what happens.
If you have everything set up properly you should be redirected to the index page and you should see the List you just created.
So far so good, right? Well not exactly there are still a number of issues we need to iron out. Lets take a deeper look and see exactly how our List and Item were saved. I grabbed these screenshots from Postico. We can see that when we check out the List data we attempted to persist everything looks great.

The problem is when we look for the Item data, we can see that it was not saved to the database.

This threw me off for a while but I eventually tracked down the issue. The problem is we never informed the List changeset that it was supposed to cast any nested associations from the params structure.
There is any easy way to fix this using cast_assoc function in Ecto. Head on over to web/models/list.ex and add |> cast_assoc(:items, required: true) to your changeset.
Note: If you want to use cast_assoc you need to make sure that the association is already preloaded in the changeset struct. We have already taken care of this above so we will be fine.
Your changeset should now look like this:
defmodule Todo.List do
  use Todo.Web, :model

   ...
  def changeset(struct, params \\ %{}) do
    struct
    |> cast(params, [:name])
    |> cast_assoc(:items, required: true)
    |> validate_required([:name])
  end
end
Now if we take a look back at Postico we can see we are getting the results we were looking for.

In addition to allowing the Item to persist cast_assoc also sets the list_id to establish the relation between the List and Item.
Ok, now things are really looking great, we are able to create a List and an Item from the same form. Now go ahead and try to edit the List you just created.
You can see we are welcomed with a nice error message. The error explains to us the we need to preload our association. Ecto does not automatically preload associations for you so you need to explicitly tell it when you want this to happen. Here is a great blog Post that goes over nested preloads.
So lets head back on over to our ListController and make the following change to our edit action.
  def edit(conn, %{"id" => id}) do
    list = Repo.get!(List, id) |> Repo.preload(:items)
    changeset = List.changeset(List)
    render(conn, "edit.html", List: List, changeset: changeset)
  end
By piping our List through to Repo.preload(:items) we are letting Ecto know that we would like to preload the associated Items. We also need to make a similar adjustment to our update action.
Change your update action to look like this.
def update(conn, %{"id" => id, "List" => List_params}) do
    list = Repo.get!(List, id) |> Repo.preload(:items)
   ...
  end
Now save those changes and head back try to edit your List again. If you a make change and click save you can see that everything is working just like we planned.
I hope you found this tutorial useful, if you would like to check out the repo you can view it here. Please leave any comments or questions below.
Thanks to Heartbeat and José for excellent blog posts on nested forms. Also shoutout to Josh for showing me some examples at RubyJax.

If you wanted it to build a product you’d find a way to get time to work on it. If you really wanted to start that new hobby you’d sacrifice something to find the time and money to do it.
I'll define a "Wannabe Entrepreneur" as someone who has never made money from their businesses. Here are the different types of wannabes.
In the past few years I've built go-carts, built a 200+ sq ft workshop, written several eBooks. How do I create a life where I have time to work on side projects?
Receive 5 Software projects mistakes we have made over the years and how to avoid them.